Om du gör upprepade dyk på en annan höjd än föregående dyk, ändra höjdinställningen så att den motsvarar nästa dyk efter att det föregående dyket avslutats. Detta ger mer precisa vävnadsberäkningar.
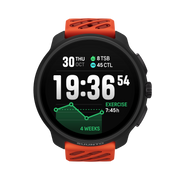
Under ett dyk visar stapeln till vänster stigningshastighet. En strecksteg motsvarar 2 m (6,6 ft) per minut.
När den högsta tillåtna stigningshastigheten överskrids i fem sekunder genereras ett larm. Brott mot stigningshastigheten resulterar i längre säkerhetsstopptider och obligatoriska säkerhetsstopp.
VARNING:ÖVERSKRID INTE DEN MAXIMALA UPPSTIGNINGSHASTIGHETEN! Snabba uppstigningar ökar risken för skador. Efter att ha överskridit högsta rekommenderade uppstigningshastighet ska du alltid göra obligatoriska och rekommenderade säkerhetsstopp. Om detta obligatoriska säkerhetsstopp inte genomförs kommer dekompressionsmodellen att straffa ditt nästa dyk(n).
Batteri
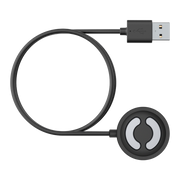
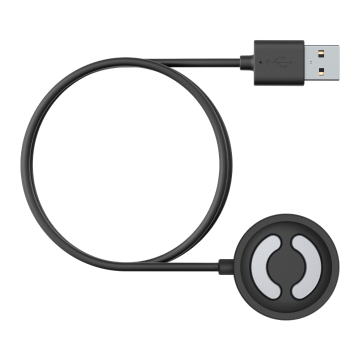
Suunto EON Steel Black har ett uppladdningsbart litiumjonbatteri. Ladda batteriet genom att ansluta Suunto EON Steel Black till en strömkälla med den medföljande USB-kabeln. Som strömkälla kan du använda datorns USB-port eller en väggladdare.
Batteriikonen i displayens övre vänstra hörn visar batteristatus. Till höger om batteriikonen visas den beräknade återstående dyktiden i timmar.
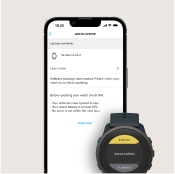
Ett popup-meddelande anger när laddning behövs.

Bokmärke
Det är enkelt att lägga till ett bokmärke (tidsstämpel) i en aktiv logg i Suunto EON Steel Black . Se så här lägger du till bokmärken för proceduren.
Taket är trasigt
Algoritmlås
I detta avsnitt beskrivs vad som händer om du bryter dekompressionstaket när du dyker med Suunto Fused™ RGBM 2-algoritmen.
Överstigning av dekompressionstaket
Om du stiger mer än 0,6 m (2 ft) över dekompressionstaket blir takparametern röd, en nedåtpekande röd pil visas och ett larm börjar ljuda.

I sådant fall ska du går ner under taknivån och fortsätta dekompressionen. Om du inte gör detta inom 3 (tre) minuter låser algoritmberäkningen och visar istället (Låst) så som visas nedan. Observera att takvärdet inte längre anges.

I sådant tillstånd ökar risken för tryckfallssjuka (DSC) avsevärt. Dekompressionsinformation är inte tillgänglig de närmaste 48 timmarna efter att du gått upp till ytan.
Algoritm låst
Låsning av algoritmen är en säkerhetsåtgärd som understryker att algoritminformationen inte längre är tillgänglig.
Det går att dyka med enheten när algoritmen är låst men i stället för dekompressionsinformation visas då (Låst). Om du dyker när algoritmen är låst återställs algoritmens låstid till 48 timmar när du kommer upp till ytan.
OBS:När du dyker med Bühlmann 16 GF-algoritmen kommer den inte att vara låst även om du bryter dekompressionstaket och hoppar över dekompressionsstoppen. Se Varning: Taket trasigt för mer information.
Varning! Taket är trasigt
I detta avsnitt beskrivs vad som händer om du bryter dekompressionstaket när du dyker med Suunto Fused™ GF 2-algoritmen.
Algoritmen Bühlmann 16 GF har inte samma algoritmlås som den i Suunto Fused™ RGBM 2-algoritmen. Om du dyker med algoritmen Bühlmann 16 GF fortsätter enheten att visa den ursprungliga dykplanen även om dekompressionsstoppet bryts. Godkänn varningen för takbrott genom att trycka på mittknappen.

När varningen försvinner syns skylten för takbrott på skärmens vänstra sida.

Loggar
Om taket bryts under dyket kommer det att synas i dykloggarna. När du kontrollerar dyket i numerisk vy visas tak trasigt som en rubrik i loggen.

Om du dyker igen efter att taket brutits, har den nya dykloggen taket gått sönder i föregående dyk.

Dykplanerare
Om taket bryts under dyket kommer det att synas i dykplaneraren. Ett pop-up meddelande visas på skärmen, säger föregående tak bruten överträdelse kommer att påverka planerare noggrannhet. Meddelandet försvinner efter tre sekunder eller så kan du ta bort det genom att trycka på mittknappen. När meddelandet försvinner kan planeraren användas som vanligt.
Klocka
Inställningar för tid och datum för Suunto EON Steel Black finns under Enhetsinställningar .
Tid- och datumformat finns under enheter och format . Information om hur du ställer in tid och datum finns i så här ställer du in tid och datum .
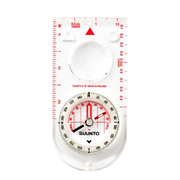
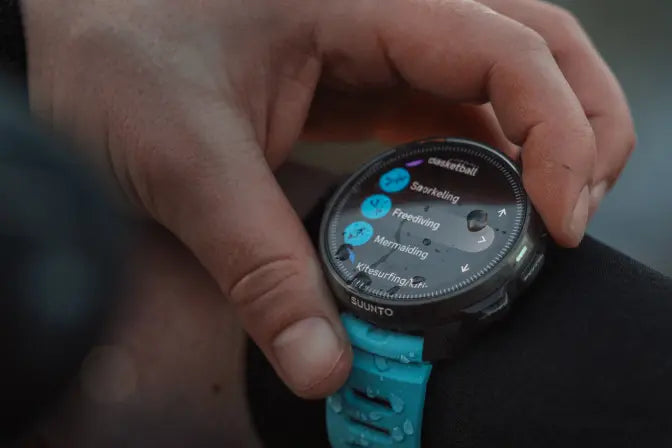
Kompass
Suunto EON Steel Black har en lutningskompenserad digital kompass som finns som huvudvy.

Kalibrering av kompass
När du börjar använda Suunto EON Steel Black och efter varje laddning måste kompassen kalibreras och den måste göra det för att aktivera den. Suunto EON Steel Black visar kalibreringsikonen när du öppnar kompassvyn.
Under kalibreringen anpassar sig kompassen till det omgivande magnetfältet.
På grund av förändringar i det omgivande magnetfältet rekommenderar vi att kompassen kalibreras om före varje dyk.
Så här startar du kalibreringen manuellt:
- Ta av dig Suunto EON Steel Black .
- Håll mittknappen intryckt för att komma till menyn.
- Bläddra till Allmänt » Kompass .
- Öppna Allmänna genom att trycka på mittknappen.
- Bläddra uppåt eller nedåt för att välja Kalibrera .
- Börja kalibrera enheten genom att försöka flytta den runt xyz-axlarna i koordinatsystemet (som om du ritade en liten cirkel) så att magnetfältet är så stabilt som möjligt under kalibreringen. För att uppnå detta bör du försöka hålla Suunto EON Steel Black på samma plats och inte flytta runt den med stora rörelser.
-
Upprepa rotationen tills kompasskalibreringen är klar.

- Ett ljud indikerar när kalibreringen lyckades och skärmen återgår till kompassmenyn .
OBS:Om kalibreringen misslyckas flera gånger i rad kan du befinna dig i ett område med starka magnetiseringskällor, t.ex. stora metallföremål. Flytta till en annan plats och försök kalibrera kompassen igen.
Inställning av missvisning
Du bör alltid justera kompassdeklinationen för det område där du dyker för att få korrekta kursavläsningar. Kontrollera den lokala missvisningen från en pålitlig källa och ställ in värdet i Suunto EON Steel Black .
Så här ställer du in missvisning:
- Håll mittknappen intryckt för att komma till menyn.
- Bläddra till Allmänt » Kompass .
- Öppna Allmänna genom att trycka på mittknappen.
- Tryck på mittknappen igen för att öppna missvisning .
- Bläddra uppåt/nedåt för att ställa in missvisningsvinkeln: Rulla uppåt mot öst eller nedåt mot väst. Om du vill stänga av deklinationen ställer du in deklinationsvinkeln på 0,0 grader.
- Tryck på mittknappen för att spara ändringarna och gå tillbaka till kompassmenyn .
- Håll mittknappen intryckt för att avsluta.
Låsa lagret
En bäring är vinkeln mellan norr och ditt mål. Enkelt uttryckt är det den riktning du vill resa. Din riktning, å andra sidan, är din faktiska färdriktning.
Du kan ställa in ett bäringslås som hjälper dig att orientera dig under vattnet och se till att du behåller färdriktningen. Du kan till exempel ställa in ett bäringslås för riktningen till revet innan du lämnar båten.
Du kan återställa lagerlåset när som helst, men du kan bara rensa ett lagerlås när du befinner dig på ytan.
Så här ställer du in ett lagerlås:
- Tryck på mittknappen för att gå till kartvyn.
- Håll din Suunto EON Steel Black i nivå framför dig, med toppen riktad i riktning mot ditt mål.
- Håll den nedre knappen intryckt tills du ser meddelandet bäring låst.

När du har låst en bäring anges låsläget på kompassrosen, enligt bilden nedan.

Nedanför din riktning (stort nummer i kompassens mitt) ser du också den relativa skillnaden mellan bäringen och din riktning. Så, till exempel, när du vill resa i den exakta riktningen för din bäring, bör det lägre numret vara 0 grader.
Om du vill ställa in ett nytt bäringslås upprepar du samma procedur ovan. Varje bäringslås registreras i dykloggen med en tidsstämpel.
Om du vill ta bort bäringslåset från kompassvyn måste du återgå till ytan.
Så här rensar du ett lagerlås:
- I ytläge håller du mittknappen intryckt för att öppna huvudmenyn.
- Bläddra till Allmänt med den övre eller nedre knappen och tryck på mittknappen.
- Öppna Allmänna genom att trycka på mittknappen.
- Välj Rensa bäring med mittknappen.
- Håll mittknappen intryckt för att avsluta.
Anpassa dyklägen med Suunto-appen
Du kan enkelt anpassa enhets- och dykinställningar, som dyklägen och vyer med Suunto-appen. Skapa upp till 10 olika dyklägen med upp till fyra anpassade vyer vardera.
Du kan anpassa följande:
- Dyklägets namn
- Inställningar (t.ex. personliga inställningar, vyer, gaser)
Se hur du anpassar dyklägen med Suunto-appen för mer information.
Dekompressionsalgoritmer
Suuntos utveckling av dekompressionsmodeller härstammar från 1980-talet när Suunto implementerade Bühlmann modell baserad på M-värden i Suunto SME. Sedan dess har forskning och utveckling fortsatt med hjälp av både externa och interna experter.
I slutet av 1990-talet implementerade Suunto Dr. Bruce Wienkes RGBM (Reduced Gradient Bubble Model) för att fungera med den tidigare M-Value-baserade modellen. De första kommersiella produkterna med den funktionen var de ikoniska Suunto Vyper och Suunto Stinger. Med dessa produkter var förbättringen av dyksäkerheten signifikant eftersom de behandlade ett antal dykomständigheter utanför intervallet för modeller med upplöst gas endast genom att:
- Övervakning av kontinuerlig flerdagarsdykning
- Beräkning av nära avstånd från repetitiv dykning
- Reagerar på ett dyk djupare än föregående dyk
- Anpassning till snabba stigningar som producerar hög mikrobubbla (tyst bubbla) uppbyggnad
- Införliva överensstämmelse med verkliga fysikaliska lagar för gaskinetik
Suunto EON Steel Black har två tillgängliga dekompressionsalgoritmer: Algoritmen Suunto Fused™ RGBM 2 och algoritmen Bühlmann 16 GF. Välj lämplig algoritm för ditt dyk under Dykinställningar » parametrar » algoritm .
OBS:Alla dekompressionsmodeller är teoretiska och har sina fördelar och begränsningar. När du väljer lämplig dekompressionsalgoritm och personliga inställningar eller gradientfaktorer för ditt dyk, ta alltid hänsyn till dina personliga faktorer, det planerade dyket och din dykträning.
OBS:Även om det är möjligt, rekommenderas inte att ändra algoritmen mellan dyk när flygförbudsberäkning är aktiv.
OBS:Se till att din Suunto-dykdator alltid har den senaste programvaran med uppdateringar och förbättringar. Före varje dyk kontrollerar du på om Suunto har släppt en ny programuppdatering för din enhet. När en programuppdatering finns tillgänglig måste du installera den innan du dyker. Uppdateringar görs tillgängliga för att förbättra din användarupplevelse och är en del av Suuntos filosofi för kontinuerlig produktutveckling och förbättring.
Suunto Fused™ RGBM 2-algoritm
Suunto Fused™ RGBM 2 kombinerar och förbättrar de erkända dekompressionsmodellerna Suunto RGBM och Suunto Fused™ RGBM som utvecklats av Suunto tillsammans med Dr Bruce Wienke. (Suuntos dykalgoritmer är resultatet av expertis och kunskap som byggts upp under flera årtionden av utveckling, tester och tusentals dyk.)
I Suunto Fused™ RGBM 2 härrör vävnadens halveringstider från Wienkes Full RGBM där människokroppen är utformad med femton olika vävnadsgrupper. Full RGBM kan utnyttja dessa ytterligare vävnader och modellera in- och utsläpp av gas mer exakt. Mängderna kväve och helium vid in- och utsläpp av gas i vävnaderna beräknas oberoende av varandra.
Suuntos algoritm Fused™ RGBM 2 har stöd för öppna och slutna dyksystem på djup ner till 150 meter. Jämfört med tidigare algoritmer är Suuntos Fused™ RGBM 2 mindre konservativ vid djupa luftdyk, vilket möjliggör kortare uppstigningstider under dekompressionsdyk. Dessutom kräver algoritmen inte längre att vävnader ska vara helt fria från resterande gaser vid beräkning av flygförbudstid, vilket minskar väntetiden som är nödvändig mellan ditt senaste dyk och en flygresa.
Fördelen med Suunto Fused™ RGBM 2 är extra säkerhet genom dess förmåga att anpassa sig till en mängd olika situationer. För fritidsdykare kan det ge något längre no deco-tider, beroende på vald personliga inställning. För dykare med öppet system tillåter den användning av gasblandningar med helium - vid djupare och längre dyk ger heliumbaserade gasblandningar kortare uppstigningstider. Och slutligen ger Suunto Fused™ RGBM 2-algoritmen för dykare med rebreather det perfekta verktyget för att användas som icke övervakande börvärdesdykdator.
OBS:Suunto EON Core-enheter med en tidigare programversion än 2.0 använder Suunto Fused™ RGBM-algoritmen. När enheten har uppdaterats till den senaste programvaran installeras Suunto Fused™ RGBM 2 på dykdatorn.
Bühlmann 16 GF algoritm
Bühlmanns dekompressionsalgoritm utvecklades av den schweiziske läkaren Albert A. Bühlmann, som började forska i dekompressionsteori år 1959. Bühlmanns dekompressionsalgoritm är en teoretisk matematisk modell som beskriver hur inerta gaser kommer in i och lämnar människokroppen när omgivningstrycket förändras. Flera versioner av Bühlmann algoritm har utvecklats under åren och antagits av många dykdatortillverkare. Suuntos dykalgoritm Bühlmann 16 GF är baserad på modellen ZHL-16C. Denna modell har 16 olika teoretiska vävnadsgrupper med halvtider från 4 minuter upp till 635 minuter.
Gradientfaktorer
Gradientfaktorn (GF) är en parameter som endast används med Bühlmann dykalgoritm. GFS är ett sätt att lägga till konservatism till Bühlmann algoritm genom att lägga till djupstopp till dyket. Gradientfaktorer delas in i två parametrar: gradientfaktor låg och gradientfaktor hög. Om du använder GF med Bühlmann-algoritmen kan du ställa in säkerhetsmarginalen för dyket genom att öka konservatismen i syfte att kontrollera när olika vävnadsrum når sitt acceptabla M-värde.
Gradientfaktorer definieras alltid som procenttal. Värdet Låg avgör det första djupstoppet (dekompressionsstopp), medan värdet Hög fastställer det acceptabla M-värdet vid ytan. Med hjälp av denna metod förändras GF under uppstigningen.
En vanlig kombination är GF låg 30 % och GF hög 70 %. (Skrivs även GF 30/70.) Denna inställning innebär att det första stoppet sker när den ledande vävnaden når 30 % av dess M-värde. Ju lägre den första siffran är, desto mindre övermättnad tillåts. Till följd av detta måste det första stoppet göras på ett större djup. I följande illustration är värdet för GF hög inställt på 30 %, och de ledande vävnadsrummen reagerar på 30 %-gränsen av M-värdet. På detta djup sker det första dekompressionsstoppet.

När uppstigningen fortsätter ökar GF från 30 % till 70 %. GF 70 anger nivån av övermättnad som tillåts när du når ytan. Ju lägre värdet är för GF hög, desto längre måste det grunda stoppet vara för att gasutsläpp ska ske innan du når ytan. I följande illustration är värdet för GF hög inställt på 70 %, och de ledande vävnadsrummen reagerar på 70 %-gränsen av M-värdet. Vid den här punkten kan du komma tillbaka upp till ytan och avsluta dyket.

Standardinställningen för Suuntos dykalgoritm Bühlmann 16 GF är 30/70. Alla andra värden än standardvärdena rekommenderas inte. Om du ändrar standardvärdena blir värdenumret rött och en varning visas på skärmen.

VARNING:Redigera inte gradientfaktorvärden förrän du förstår vilken inverkan de har. Vissa inställningar för gradientfaktorer kan leda till stor risk för dykarsjuka eller andra personskador.
Effekterna av gradientfaktorer på dykprofilen
Effekten av GF Låg % på dykprofilen visas i följande bild. Den visar hur GF Låg % avgör djupet där uppstigningen börjar sakta ner, samt djupet där det första dekompressionsstoppet sker. Bilden visar hur olika GF Låg %-värden påverkar djupet för det första stoppet. Ju högre GF Låg %-värdet är, desto grundare måste det första stoppet ske.

OBS:Om GF Låg %-värdet är för lågt kan vissa vävnader fortfarande släppa in gas när det första stoppet görs.
Effekten av GF Hög % på dykprofilen visas i följande bild. Den visar hur GF Hög % avgör dekompressionstiden i den grunda fasen av dyket. Ju högre GF Hög %-värdet är, desto kortare blir den totala dyktiden och desto mindre tid befinner sig dykaren på grunt vatten. Om GF Hög % är inställt på ett lägre värde befinner sig dykaren längre tid på grunt vatten, och den totala dyktiden blir längre.

Om du vill se jämförelsen mellan algoritmen Suunto Fused™ RGBM 2 och algoritmen Bühlmann 16 GF går du till suunto.com/support .
Säkerhet för dykare
Eftersom alla dekompressionsmodeller är rent teoretiska och inte övervakar dykarens faktiska kropp, kan ingen dekompressionsmodell garantera att tryckfallssjuka inte ska inträffa.
VarningAnvänd alltid samma personliga och höjdinställningar för det faktiska dyket och för planeringen. Om du ökar den personliga justeringsinställningen från den planerade inställningen och ökar höjdjusteringsinställningen kan det leda till längre dekompressionstider djupare och därmed till större önskad gasvolym. Du kan få slut på andningsgas under vattnet om den personliga justeringsinställningen har ändrats efter dykplaneringen.
Syrgasexponering
Beräkningar av syrgasexponering grundar sig på aktuella, accepterade tabeller och principer när det gäller tidsgränser för dyktid. Utöver detta använder dykdatorn flera metoder för att försiktigt uppskatta syrgasexponeringen. Till exempel:
- De beräkningar av syrgasexponering som visas avrundas uppåt till närmast högre procenttal.
- CNS%-gränserna upp till 1,6 bar (23,2 psi) är baserade på 1991 NOAA-gränser för dykning.
- -kontrollen baseras på daglig toleransnivå över en lång period och återhämtningstiden är reducerad.
Syrgasrelaterad information som visas av dykdatorn är också utformad för att säkerställa att alla varningar och visningar inträffar vid rätt faser av ett dyk. Till exempel ges följande information före och under ett dyk när datorn är inställd på Air/Nitrox eller Trimix (om helium är aktiverat vid användning):
- Vald O 2 % (och möjlig helium %)
- CNS% och OTU (visas endast efter anpassning i Suunto-appen)
- Hörbart meddelande när CNS% når 80%, sedan varning när 100%-gränsen överskrids
- Meddelande när OTU når 250 och sedan varning när 300 gränsen överskrids
- Ljudlarm när PO 2 - värdet överskrider den förinställda gränsen ( larm för övre PO 2)
- Ljudlarm när PO 2 - värdet är < 0,18 ( larm om nedre PO 2)
VARNING:NÄR SYREGRÄNSFRAKTIONEN ANGER ATT MAXGRÄNSEN UPPNÅTTS, MÅSTE DU OMEDELBART VIDTA ÅTGÄRD FÖR ATT MINSKA SYRGASEXPONERINGEN. Att inte göra något för att minska syrgasexponeringen efter att en CNS%/OTU-varning givits kan snabbt öka risken för syretoxicitet, skada eller död.
Dekompressionsdyk
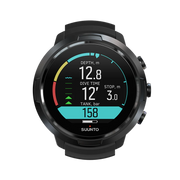
När du befinner dig på ett dekompressionsdyk (deco) överskrider du gränsen för ingen dekompression, och Suunto EON Steel Black tillhandahåller den dekompressionsinformation som krävs för uppstigning. Uppstigningsinformation presenteras alltid med två värden:
- : djup som du inte ska gå över
- asc. tid : optimal uppstigningstid i minuter till ytan med givna gaser
VARNING:GÅ ALDRIG UPP ÖVER TAKET! Du får inte gå upp över taket under din dekompression. För att du inte ska göra det oavsiktligt, ska du hålla dig något under taket.
På ett dekompressionsdyk kan det finnas tre typer av stopp:
-
SäkerhetsstoppEtt rekommenderat treminutersstopp för varje dyk över 10 meter (33 ft).
-
Djupstoppdetta är ett rekommenderat stopp när du dyker djupare än 20 m (66 ft).
-
Dekompressionsstopp:detta är ett obligatoriskt stopp på ditt dekompressionsdyk som är för din säkerhet, för att förhindra dekompressionssjuka.
I Dykinställningar » parametrar kan du
- aktivera eller inaktivera djupstopp (det är aktiverat som standard)
- Du kan justera säkerhetsstoppet till 3, 4 eller 5 minuter (standardinställningen är 3 minuter).
- ställ in djupet för sista stoppet på 3,0 m eller 6,0 m (standard är 3,0 m)
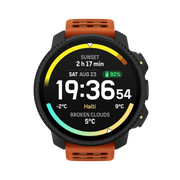
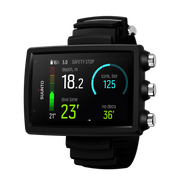
Följande illustration visar ett dekompressionsdyk där taket är 17,7 m (58 fot):

Uppifrån och ner ser du följande i bilden ovan:
-
Det finns ett dekompressionsfönster (Deco fönster) som är avståndet mellan dekompressionstaket (Deco tak) plus 3,0 m (9,8 ft) och dekompressionstaket. Så decom-fönstret i det här exemplet är mellan 20,7 m (68 ft) och 17,7 m (58 ft). Det är här dekompression sker. Ju närmare taket du stannar, desto mer optimal är dekompressionstiden.
När du tar dig upp till i närheten av takdjupet och kommer in i området för dekompressionsfönstret, visas två pilar bredvid djupnumret. De vita pilarna som pekar nedåt och uppåt indikerar att du befinner dig inom deco-fönstret.
-
Om du stiger över takdjupet finns det fortfarande ett säkerhetsmarginalområde som motsvarar takdjupet minus 0,6 meter (2 ft). Så i det här exemplet är det mellan 17,7 m (58 fot) och 17,1 m (56 fot). I detta säkra område fortsätter dekompressionsberäkningen, men du blir meddelad om att gå ner under takdjupet. Detta indikeras av att numret för takdjupet blir gult med en gul pil som pekar nedåt framför sig.
-
Om du går över säkerhetsmarginalområdet, pausas dekompressionsberäkningen tills du går under gränsen igen. Ett ljudlarm och en röd nedåtpekande pil framför takdjupsvärdet indikerar riskabel dekompression.
Om du ignorerar larmet och håller dig över säkerhetsmarginalen i tre minuter låser Suunto EON Steel Black algoritmberäkningen och dekompressionsinformationen kommer inte längre att vara tillgänglig på dyket. Se Algorithm Lock .
Exempel på visning av dekompression
Suunto EON Steel Black visar alltid takvärdet från det djupaste av dessa stopp.
I nedanstående display är takdjupet inställt på 17,1 m och dykaren är för närvarande på 17,1 m. vita pilar bredvid takdjupvärdet visar att dykaren är inne i dekompressionsfönstret.

Följande exempel visar att dekompressionsdjupet är på 15,2 m och dykaren är på 14,7 m. dykaren är fortfarande inne i dekompressionsfönstret men över den optimala gränsen. En gul nedåtriktad pil indikerar att dykaren rekommenderas att gå ner för att vara på optimalt djup.

Följande exempel visar att dekompressionsdjupet är på 12,4 m och dykaren är på 11,0 m. dykaren är utanför dekompressionsfönstret och måste stiga ner. En röd pil och ett larmljud uppmanar dykaren att dyka djupare och takdjupet indikeras i rött.

OBS:När du dyker med Suunto Fused™ RGBM 2-algoritmen och taket är trasigt i mer än 3 minuter låses dekompressionsalgoritmen.
I uppstigningsläge sjunker taket konstant medan du befinner dig nära takdjupet, vilket ger kontinuerlig dekompression med optimal uppstigningstid. I det stegade stigningsläget är taket detsamma under en viss tid och flyttas sedan uppåt 3 m (9,8 ft) åt gången.
OBS:Det rekommenderas alltid att hålla sig nära dekompressionstaket när du stiger upp.
Stigningstiden är alltid den minsta tid som behövs för att nå ytan. Det omfattar:
- Tid som krävs för djupstopp
- Stigningstid från djup vid 10 m (33,0 fot) per minut
- Tid som behövs för dekomprimering
VARNING:När du dyker med flera gaser, kom ihåg att stigningstiden alltid beräknas med antagandet att du använder alla gaser som finns i menyn gaser. Kontrollera alltid att du bara har gaserna för ditt aktuella planerade dyk definierade innan du dyker. Ta bort de gaser som inte är tillgängliga för dyket.
VARNING:DEN VERKLIGA UPPSTIGNINGSTIDEN KAN VARA LÄNGRE ÄN VAD SOM VISAS PÅ DYKDATORN! Uppstigningstiden ökar om du: (1) blir kvar på djupet, (2) stiger långsammare än 10 m/min, (33 ft/min) (3) gör dekompressionsstoppet djupare än vid taket och/eller (4) glömmer att ändra den använda gasblandningen. Dessa faktorer kan också öka mängden andningsgas som krävs för att nå ytan.
Senaste stoppdjup
Du kan justera det sista stoppdjupet för dekompressionsdyk under Dykinställningar » parametrar » Senaste stoppdjup . Det finns två alternativ: 3 m och 6 m (9,8 ft och 19,6 ft).
Som standard är det sista stoppdjupet 3 m (9,8 ft). Detta är det rekommenderade djupet för sista stoppet.
OBS:Inställningen påverkar inte takdjupet under ett dekompressionsdyk. Det sista takdjupet är alltid 3 m (9,8 ft).
Tips:Det kan vara en god idé att ställa in det sista stoppdjupet på 6 m (19,6 ft) när du dyker i grov sjö och det är svårt att stanna på 3 m (9,8 ft).
Dekoprofil
Deco-profil kan väljas i Dykinställningar » parametrar » Deco-profil .
Kontinuerlig dekompressionsprofil
Sedan Haldanes 1908 bord har dekompressionsstopp traditionellt använts i fasta steg som 15 m, 12 m, 9 m, 6 m och 3 m. denna praktiska metod introducerades innan dykdatorer kom. Men när en dykare gör en uppstigning så sker dekompressionen i mer gradvisa ministeg och skapar en jämn dekompressionskurva.
Uppfinnandet av microprocessorer har gett Suunto möjlighet att utforma hur dekompressionen faktiskt går till med högre precision. En kontinuerlig dekompressionskurva ingår i arbetsantagandet för Suunto Fused™ RGBM 2.
Under en uppstigning som involverar dekompressionsstopp beräknar Suuntos dykdatorer punkten på vilken kontrolldelen överstiger det omgivande trycket (det är punkten på vilken vävnadstrycket är högre än det omgivande trycket) och gasutsläpp påbörjas. Detta benämns dekompressionsgolvet. Över detta golvdjup och under takdjupet finns det så kallade dekompressionsfönstret. Dekompressionsfönstrets storlek beror på dykprofilen.
Gasutsläpp i fast huvudvävnad sker långsamt nära eller på golvet eftersom den yttre gradienten är liten. Mindre vävnader kan fortfarande ge gasinsläpp och med tillräcklig tid kan dekompressionskravet öka, och i det fallet kan taket flyttas ner och golvet höjas.
Suuntos RGBMs optimerar dessa två motstridiga problem genom en kombination av en långsam stigningshastighet och kontinuerlig dekompressionskurva. Allt handlar om att kontrollera den expanderande gasen under en uppstigning. Det är därför alla Suunto RGBMs använder en maximal stigningshastighet på 10 m/minut, vilket har visat sig vara en effektiv skyddsåtgärd genom åren.
Dekompressionsgolvet representerar punkten på vilken algoritmen ska maximera bubbelkompressionen, medan dekompressionstaket maximerar gasutläppet.
Den extra fördelen med att ha tak och golv för dekompression är att det i grov sjö kan vara svårt att behålla det exakta djupet för optimal dekompression. Genom att bibehålla ett djup under taket men över golvet, sker fortfarande dekompression, även om det sker långsammare än vad som är optimalt. Det ger även en extra buffert för att minimera risken att vågorna lyfter dykaren över taket. Den kontinuerliga dekompressionskurvan som används av Suunto ger även en smidigare och mer naturlig dekompressionsprofil än den traditionella stegmodellen.
Suunto EON Steel Black har en funktion som visar dekompressionstaket. Den optimala dekompressionen sker i dekompressionsfönstret, som visas med både pilar uppåt och nedåt bredvid djupvärdet. Om du överskrider takdjupet visas en nedåtpil och ett ljudalarm uppmanar dykaren att genast gå tillbaka ner till dekompressionsfönstret.
Stegad dekompressionsprofil
I denna dekoprofil delas uppstigningen upp i de traditionella stegindelningarna eller etapperna på 3 m (10 ft). I den här modellen dekomprimerar dykaren på traditionella fasta djup.

OBS:Val av dekompressionsprofil är tillgängligt för EON Steel Black-enheter och EON Steel-enheter med programuppdatering 2,5.
Enhetsinfo
Information om Suunto EON Steel Black finns i enheten. Denna information omfattar enhetsnamn, serienummer, programvaru- och maskinvaruversioner och information om radioöverensstämmelse. Se så här kommer du åt enhetsinformation .
Skärmar
Skärmens LED-bakgrundsbelysning är alltid på när enheten är aktiv. Den kan inte stängas av, men du kan sänka skärmens ljusstyrka för att förlänga batteritiden avsevärt.
Information om justering av bildskärmens ljusstyrka finns i så här ändrar du bildskärmens ljusstyrka .
Dykhistorik
Dykhistoriken är en sammanfattning av alla dyk som gjorts med Suunto EON Steel Black . Historien är uppdelad enligt dyktypen som användes för dyket. Varje dyktyp summerar antalet dyk, sammanlagda dyktimmar och maximalt djup. Ange historik under Allmänt » om EON :

OBS:Om det finns mer historikinformation tillgänglig än vad som kan visas på en enda skärm kan du bläddra genom den ytterligare informationen med den övre och nedre knappen.
Dyklägen
Suunto EON Steel Black har som standard fyra dyklägen: Luft/Nitrox, Trimix, CCR och mätare (bottentimer). Välj lämpligt läge för dyket under Dykinställningar » Läge .

OBS:Suunto EON Steel Black visar alla namn på dyklägen på engelska. Du kan ändra namn på dyklägen via Suunto-appen.
OBS:Alla dyklägen är som standard i klassisk vystil. Du kan ändra denna och andra inställningar, samt ställa in nya vyer och skapa ytterligare dyklägen med Suunto-appen.
I Suunto-appen kan du skapa nya eller redigera befintliga dyklägen, ändra skärmlayouter, ändra helium- och multi-gasinställningar och ändra dyktyp (OC/CC).
Luft/nitrox-läge
Som standard Luft/nitrox läget är för dykning med vanlig luft och dykning med syreberikade gasblandningar.
Dykning med nitroxgasblandning gör att du kan öka bottentiderna eller minska risken för dekompressionssjukdom. Suunto EON Steel Black ger dig information så att du kan justera ditt dyk och hålla dig inom säkra gränser.
När du dyker med nitroxgasblandningar måste både procentandelen syrgas i din flaska och partialtrycket av syre anges i . Detta säkerställer korrekta beräkningar av kväve och syre och korrekt maximalt operativt dykdjup () vilka baseras på de värden du anger. Den förinställda procentandelen för syrgas (O2%) är 21 % (luft) och partialtrycket för syre (pO2) är 1,6 bar (23 psi).
OBS:Vid dykning med en nitroxgasblandning rekommenderar Suunto att partialtrycket ändras till 1,4 bar (20 psi).
Luft/Nitrox har som standard två vyer:
-
No deco:

-
Kompass

OBS:Luft/Nitrox-dykläget har som standard en aktiv gas. Du kan redigera denna gas på enhetsmenyn där O 2 procent och PO 2 - värdet kan ändras. För att möjliggöra dykning med mer än en gas, måste du aktivera multi-gas dykning under Dykinställningar » parametrar » flera gaser . Efter det här steget kan du lägga till ytterligare gaser i menyn gaser. Gasinställningarna kan också anpassas i Suunto-appen.
Trimix-läge
Trimix dykläget är för dykning med en andningsgas som består av syre, kväve och helium. Med helium tillsatt kan du skapa gasblandningar som är optimala för ditt dyk.
Trimix-läget är typiskt för djupdyk med förlängd dyktid.
Trimix-läget har som standard två vyer:
-
No deco:

-
Kompass

OBS:I Trimix-läget aktiveras alternativet flera gaser automatiskt på Suunto EON Steel Black.
OBS:Vid dykning med helium aktiverat är deepstop aktiverat som standard, och det kan inte stängas av.
CCR-läge
CCR är ett dykläge dedikerat till rebreather-dykning.
När du väljer CCR-läge har enheten två olika gasmenyer: CC-gaser (slutna gaser) och OC-gaser (öppna gaser). Mer information om dykning i CCR-läge finns i Rebreather dykning .
CCR-läget har som standard två vyer
-
No deco:

-
Kompass

OBS:Vid dykning med helium aktiverat är deepstop aktiverat som standard, och det kan inte stängas av.
Mätarläge
Använd Suunto EON Steel Black som bottentimer med. Mätare.
Mätarläget är endast en bottentimer. Den använder inte någon dekompressionsalgoritm, alltså den inbegriper inte dekompressionsinformation eller beräkningar.
Mätarläget har som standard två vyer.
-
Timer

-
Kompass

OBS:Efter dykning i mätningsläge är dekompressionsberäkningen låst i 48 timmar. Om du under denna tid dyker igen i luft/Nitrox-, Trimix- eller CCR-läge kommer inte dykalgoritmen och dekompressionsberäkningen att vara tillgängliga och låst visas på skärmen
OBS:Låst tid återställs till 48 timmar om du startar ett nytt dyk medan enheten är låst.
Dykplanerare
Dykplaneraren i Suunto EON Steel Black hjälper dig att snabbt planera ditt nästa dyk. Planeraren visar tillgänglig ingen dekompressionstid och gastider för ditt dyk baserat på djup, tankstorlek och inställd gasförbrukning.
Dykplaneraren kan också hjälpa dig att planera dyk i serie, med hänsyn till kvarvarande kväve från dina tidigare dyk baserat på den planerade yttiden du anger.
OBS:Det är viktigt att justera tankstorlek, tanktryck och personlig gasförbrukning för att få rätt gasberäkningar.
Se hur du planerar ett dyk med Dykplaneraren för mer information om hur du planerar dina dyk.
Enriched Air Nitrox dykning användning
Denna enhet kan användas med nitrox andningsgaser (även känd som oxy-nitrogen).
VARNING:Använd inte nitroxgasblandningar om du inte har rätt utbildning. Du måste ha genomgått rätt utbildning med berikad luft för att använda denna typ av utrustning med syrehalt över 22%.
VARNING:När du använder nitrox beror maximalt operativt dykdjup och ingen dekompressionstid på hur mycket syre gasen innehåller.
VARNING:Vid användning av nitrox finns det risk för att föroreningar kan ge upphov till syreantändning.
VARNING:Användning av andningsluft enligt en 12021 kan förorena dykutrustningen.
OBS:För att minimera risken för att syre antänds, öppna alltid tryckventilen eller tryckventilerna långsamt.
Mer information om Nitrox-dykning med Suunto Tank POD finns i information om säkerhet och föreskrifter som levereras med din Tank POD eller på SuuntoTankPodSafety .
Vänd visning
Du kan vända på skärmen på Suunto EON Steel Black så att knapparna sitter på antingen vänster eller höger sida av dykdatorn, vilket gör den enklare att bära på båda armarna.
Ändra knappens orientering under allmänna » Enhetsinställningar » Vänd visning .
Välj knappar höger för att ha knapparna på höger sida eller knappar vänster för att ha dem på vänster sida.
Gasförbrukning
Gasförbrukning avser din förbrukningshastighet av gas i realtid under ett dyk. Med andra ord är det den mängd gas en dykare skulle använda på en minut på ytan. Detta är allmänt känt som din ytluftförbrukning eller SAC-hastighet.
Gasförbrukningen mäts i liter per minut (kubikfot per minut). Det här är ett valfritt fält och måste läggas till i dina vyer för anpassat dykläge i Suunto-appen. I den klassiska vyn nedan är gasförbrukningen i det nedre högra hörnet.

Information om hur du aktiverar mätning av gasförbrukning finns i så här aktiverar du mätning av gasförbrukning .
Gasblandningar
Som standard har Suunto EON Steel Black endast en gas (luft) tillgänglig. Den förinställda procentandelen för syrgas (O2%) är 21 % (luft) och partialtrycket för syre (pO2) är 1,6 bar (23 psi). Du kan ändra O2-procent och pO2-inställningar i menyn .
OBS:Vid dykning med en nitroxgasblandning rekommenderar Suunto att partialtrycket ändras till 1,4 bar (20 psi).
Om du dyker med endast en gas, se till att ha endast den gasen i menyn . Annars förväntar sig att du använder alla gaser i listan och uppmanar dig att byta gas under dyket.
Om du behöver mer än en gas aktiverar du alternativet för flera gaser på enheten. Gå till Dykinställningar » parametrar och aktivera alternativet flera gaser.
Du måste ange alla gasblandningar som ska användas under dyket i menyn (gaser) eftersom dekompressionsalgoritmen beräknar uppstigningstiden under ditt dyk med hänsyn till alla gaser som finns tillgängliga i menyn (gaser).
Om du vill använda trimix-gasblandningar (med helium aktiverat) måste du aktivera helium under » . När du gjort detta kan du ändra procenten för helium (He%) för den valda gasen i menyn .
Du kan även använda Suunto-appen för att aktivera dykning med flera gaser och helium, konfigurera dyklägen och ändra gasinställningar.
Ändra gas under pågående dyk
Det är viktigt att förstå hur din -enhet fungerar när du dyker med flera gaser. Du kan till exempel ha följande gaser vid dykning till 55 m (180,5 ft):
- tx18/45, MOD 62,2 m (pO2 1,3)
- tx18/10, MOD 22 m (pO2 1,6)
- Nx99, MOD 6 m
Vid uppstigning meddelas du om byte av gas vid 22 m (72 ft) och 6 m (20 ft) beroende på gasens maximala operativa dykdjup (maximum operating depth, MOD). För att ta en bättre gas i bruk måste du byta gas manuellt genom att utföra följande steg:
- Tryck på valfri knapp för att bekräfta aviseringen om gasbyte.
- Långt tryck på mittknappen för att se vilka gasalternativ som finns.
- Skrolla med den övre eller nedre knappen till önskad gas.
- Bekräfta valet av gas genom att trycka på mittknappen.
OBS:Om du trycker på någon knapp medan -meddelandet visas på enhetens skärm, försvinner meddelandet. Genom att trycka på en knapp bekräftar du bara meddelandet, men gasen ändras inte automatiskt. Du ska alltid änndra gas manuellt För att byta gas måste du följa de ovan angivna stegen.
OBS:När du väljer delas gasblandningar upp i gaser för öppen krets och gaser för sluten krets. Se rebreather dykning .
Ändra gaser under pågående dyk
Gaslistan i din enhet ska endast ändras i nödfall. Du kan till exempel på grund av oförutsedda händelser förlora en gasblandning. Du kan då anpassa dig till situationen genom att ta bort gasblandningen från gaslistan i . På så sätt kan du fortsätta dyket och få korrekt dekompressionsinformation på dykdatorn.
I ett annat fall, om du av någon anledning får slut på gas och behöver använda en gasblandning från en dykkompis, är det möjligt att anpassa Suunto EON Steel Black till situationen genom att lägga till den nya gasblandningen i listan. Suunto EON Steel Black räknar om dekompression och visar korrekt information.
OBS:Denna funktion är inte aktiverad som standard, utan den måste aktiveras och skapar ett extra steg i gasmenyn under dyket. Funktionen är endast tillgänglig om flera gaser har valts för dykläget.
Om du vill aktivera modifiering av gaser aktiverar du funktionen i inställningsmenyn under Dykinställningar » parametrar » Modifiera gaser .
När funktionen är aktiverad under ett dyk med flera gaser kan du lägga till en ny gas och välja en befintlig gas i gaslistan för att ta bort den.
OBS:Duu kan inte ändra eller ta bort den gas som för tillfället används (aktiv gas).
När är på kan du ta bort gaser som inte används från gaslistan, lägga till nya gaser i listan och ändra parametrar (O2, He, pO2) för ej aktiva gaser.
Isobarisk motdiffusion (ICD)
ICD sker när inerta gaser (till exempel kväve och helium) diffunderar (sprids ut) åt olika håll under ett dyk. Med andra ord absorberas en gas av kroppen medan den andra frigörs. ICD är en risk vid dykning med trimix blandningar.
Detta kan hända under ett dyk, till exempel när trimix gas växlas till nitrox eller lätt trimix. När omkopplaren görs diffunderar helium och kväve snabbt i motsatta riktningar. Detta ger en övergående ökning av totalt inertgastryck som kan leda till dekompressionssjuka (DCS).
För närvarande finns det inga algoritmer som kan hantera ICD. Därför måste du ta hänsyn till det när du planerar trimix dyk.
Du kan använda Suunto EON Steel Black för att planera din trimix-användning på ett säkert sätt. På menyn gaser kan du justera procentsatserna för syre (O 2 ) och helium (He) för att se förändringen i partialtrycket för kväve (ppN2) och partialtrycket för helium (ppHe).
En ökning av partialtrycket indikeras med ett positivt tal och en minskning med ett negativt tal. Ändringarna i ppN2 och ppHe visas bredvid varje gasblandning som du vill växla till. Maximalt operativt dykdjup är det djup där syrets partialtryck () i gasblandningen överskrider en säker gräns. Du kan definiera PO 2 - gräns för gasen.
En ICD-varning genereras när:
- Gasomkopplarens djup är större än 10 m (33 fot).
- Det geometriska medelvärdet av den partiella tryckförändringen i N2 och den partiella tryckförändringen i HE är större än 0,35 bar.
Om dessa gränser överskrids med en gasbrytare indikerar Suunto EON Steel Black risken för ICD enligt nedan:

I detta exempel är de tillgängliga gasblandningarna för ett djupt trimix dyk:
- tx18/55, MOD 76,7 m (pO2 1,3)
- tx18/15, MOD 27,1 m (pO2 1,3)
- tx18/10, MOD 22 m (pO2 1,6)
- Syre, mod 6 m.
Suunto EON Steel Black belyser det farliga ICD-tillståndet när gasblandningen växlar från 15/55 till 35/15 på ett djup av 27,1 m.
Om denna gasomkopplare görs är förändringen i ppN2 och ppHe långt bortom de säkra gränserna.
Ett sätt att undvika ICD-risken är att öka heliumhalten i den första dekompressionsgasblandningen (trimix 35/15) för att få en 35/32 trimix blandning. På grund av denna förändring behöver den andra dekompressionsgasen (trimix 50/10) mer helium för att undvika ICD-risk. Den andra dekompressionsgasblandningen bör vara trimix 50/12. Dessa modifieringar skulle hålla förändringarna i partialtrycket på en säker nivå och eliminera risken för plötslig ICD.
Gastid
Gastid avser återstående luft (gas) kvar med aktuell gasblandning, mätt i minuter. Tiden baseras på flaskans tryckvärde, flaskans storlek samt din aktuella andningsfrekvens och ditt djup.
Gastiden är också mycket beroende av ditt nuvarande djup. Till exempel, om alla andra faktorer är desamma, inklusive andningsfrekvens, tanktryck och tankstorlek, påverkar djupet gastiden enligt följande:
- Vid 10 m (33 fot, omgivande tryck 2 bar) är gaststiden 40 minuter.
- Vid 30 m (99 fot, omgivande tryck 4 bar) är gaststiden 20 minuter.
- Vid 70 m (230 fot, omgivande tryck 8 bar) är gaststiden 10 minuter.
Information om gastid visas som standard i dyklägena luft/Nitrox och Trimix. Om du inte har parat ihop en Suunto Tank POD visar fältet gas Time ej tillämpligt Om du har parat ihop en POD men inga data tas emot visas – i fältet. Detta kan bero på att POD-enheten är utom räckhåll, att flaskan är stängd eller att POD:ens batterinivå är låg.

OBS:Ställ in tankstorlek under menyn gaser för att få rätt gasförbrukning och gastidsberäkningar.
OBS:Värdet för gastid visar noll och blir rött om tanktrycket sjunker under 35 bar (500 psi).
Språk och enhetssystem
Du kan ändra enhetens språk och enhetssystem när som helst när du inte dyker. Suunto EON Steel Black uppdateras omedelbart för att återspegla ändringarna.
Information om hur du ställer in dessa värden finns i ställa in språk och enhet .
Loggbok
Dykloggar hittar du under loggar . Dyk listas efter datum och tid, och varje post visar maxdjup och dyktid för loggen.

Det går att bläddra genom dyklogguppgifter och profilen genom att skrolla genom loggarna med den övre eller nedre knappen och markera en logg med mittknappen.
Varje dyklogg innehåller dataexempel med fasta 10-sekundersintervaller. Dykprofilen innehåller en markör för att bläddra i loggade data, rullbar med övre och nedre knappar. En blå linje visar djup och en vit linje visar temperatur. Om du dyker med Tank POD, visas även diagram över tanktryck och gasförbrukning.


Sista sidan i loggboken innehåller ytterligare data. Tryck på mittknappen för att hitta medeldjup, CNS-procent och OTU-värde.

Ladda upp dyken till Suunto-appen för mer detaljerade logganalyser.
När loggbokens minne blir fullt raderas de äldsta dyken för att göra plats för nya.
OBS:Om du dyker upp på ytan och sedan dyker igen inom fem minuter räknar Suunto EON Steel Black det som ett dyk.
Syrgasberäkningar
Under ett dyk beräknar Suunto EON Steel Black partialtrycket för syrgas (PO 2 ), toxicitet för centrala nervsystemet (CNS%) och toxicitet för pulmonell syrgas, spårade av OTU (Oxygen Toxicity Units). Beräkningar av syrgasexponering grundar sig på aktuella, accepterade tabeller och principer när det gäller tidsgränser för dyktid.
Som standard visas inte CNS%- och OTU-värdena i luft/Nitrox-dykläge förrän de når 80 % av de rekommenderade gränserna. När något av värdena når 80 % meddelar EON Steel dig och värdet stannar kvar i vyn. I standardläget Trimix visas CNS% och OTU-värden på skärmen som rullningsbar information.
OBS:Du kan anpassa vyer så att de alltid visar CNS% och OTU.
Personliga inställningar
Suunto Fused™ RGBM 2-algoritmen ger 5 personliga inställningsalternativ (+2, +1, 0, -1, -2). Dessa alternativ gäller dekompressionsmodeller. + 2 och +1 kan betraktas som konservativa, medan -2 och -1 kan betraktas som aggressiva. 0 är standardinställningen och är neutral, för idealiska förhållanden. Konservativt betyder säkrare. I praktiken innebär det att ett dyk på ett visst djup är kortare på grund av dekompressionsskyldigheten (dekompressionstiden är kort).
Konservativ innebär också att den tid dykaren behöver spendera på dekompression är längre. För fritidsdykare innebär en konservativ modell mindre tid i vattnet för att undvika dekompressionskrav. För tekniska dykare innebär dock konservativ mer tid i vattnet på grund av de längre dekompressionskraven som ställs under uppstigningen.
Aggressiva modeller, å andra sidan, ökar de potentiella hälsoriskerna med ett dyk. För fritidsdykare tillåter en aggressiv modell mer tid på djupet, men kan avsevärt öka risken för dekompressionssjuka (DCS).
Standardinställningen för Suunto Fused™ RGBM och Fused™ RGBM 2 är att använda en kompromiss (0 inställning) mellan konservativ och aggressiv. Med den personliga inställningen kan du välja gradvis mer konservativa eller mer aggressiva beräkningar.
Det finns flera riskfaktorer som kan påverka din känslighet för DCS, t.ex. din personliga hälsa och ditt beteende. Sådana faktorer varierar mellan olika dykare och från en dag till en annan.
De personliga faktorer som tenderar att öka risken för tryckfallssjuka är bland annat följande:
- exponering för låg temperatur – vattentemperatur lägre än 20 ° C (68 °F)
- under genomsnittlig fysisk konditionsnivå
- ålder, speciellt över 50 år
- trötthet (efter att ha tränat hårt, för lite sömn, en utmattande resa)
- uttorkning (påverkar blodcirkulationen och kan sakta ner gasutsläpp)
- stress
- hårt åtsittande utrustning (kan sakta ner gasutsläpp)
- övervikt (BMI som anses som övervikt)
- triumseptumdefekt (patent foramen ovale, PFO)
- träning före eller efter dyk
- ansträngande aktivitet under ett dyk (ökar blodflödet och tillför extra gas till vävnaderna).
VARNING:STÄLL IN RÄTT HÖJDINSTÄLLNINGAR! När man tror att det finns riskfaktorer som tenderar att öka risken för DCS rekommenderar vi att du använder det här alternativet för att göra beräkningarna mer försiktiga. Om du inte väljer rätt personliga inställningar kommer det att resultera i felaktiga dyk- och planeringsdata.
Använd den här personliga inställningen i fem steg för att justera algoritmens försiktighet så att den passar din känslighet för dykarsjuka. Du hittar inställningen under Dykinställningar » parametrar » personligt .
| Personlig nivå |
Förklaring |
| Mer aggressiv (-2) |
Idealiska förhållanden, utmärkt fysisk kondition, mycket erfaren med en hel del dyk i den närmaste tiden |
| Aggressiv (-1) |
Idealiska förhållanden, god fysisk kondition, väl erfaren med dyk i det närmaste förflutna |
| Standard (0) |
Idealiska förhållanden (standardvärde) |
| Konservativ (+1) |
Det finns vissa riskfaktorer eller förhållanden |
| Mer konservativ (+2) |
Det finns flera riskfaktorer eller tillstånd |
VARNING:Personliga justeringsinställningar 0, -1 eller -2 medför hög risk för DCS eller andra personskador samt dödsfall.
Rebreather dykning
Som standard har Suunto EON Steel Black ett läge som är avsett för rebreather-dykning, CCR-läge. Det här läget använder fasta höga/låga börvärden som du kan ändra i dykdatorn eller via Suunto-appen.
Suunto rekommenderar att du använder klassisk eller grafisk stil med rebreather-dykning. Du kan dock använda den framträdande vyn och anpassa fält om så önskas.
Beräkning av fasta börvärden gör att Suunto EON Steel Black kan användas som reservdykdator vid rebreather-dyk. Den styr eller övervakar inte rebreatherenheten på något sätt.
När du väljer ditt anpassade multi-gas-läge för CCR (closed-circuit rebreather) dykning i dyklägesinställningen har enheten två olika gas-menyer: CC-gaser (slutna gaser) och OC-gaser (öppna gaser).
OBS:För rebreather-dyk ska Suunto EON Steel Black endast användas som en backup-enhet. Den primära kontrollen och övervakningen av dina gaser bör göras genom rebreather själv.
Slutna gaser
På ett rebreather dyk behöver du minst två slutna gaser: En är din rena syrgastank och den andra är ett spädningsmedel. Du kan definiera ytterligare spädningsmedel efter behov.
Du kan endast lägga till spädningsmedel i gaslistan. Som standard förutsätter Suunto EON Steel Black att syrgas används och visas därför inte i gaslistan.
Rätt procenttal för syre och helium för spädningsgaserna i dina spädningscylindrar måste alltid anges i dykdatorn (eller via Suunto-appen) för att säkerställa korrekt beräkning av vävnad och syre. Spädningsgaser som används på ett rebreather-dyk finns under CC-gaser i huvudmenyn.
Gaser med öppen krets
Precis som med spädningsmedel måste du alltid definiera rätt syre- och heliumprocent av bailout-gaserna för alla dina cylindrar (och ytterligare gaser) för att säkerställa korrekt vävnads- och syreberäkning. Bailout gaser för ett rebreather dyk definieras under OC gaser i huvudmenyn.
Setpoint
Rebreather-dykläget har två börvärden, låg och hög. Båda är konfigurerbara:
- Låg setpoint 0,4/0,9 (standard) 0,7.
- Hög setpoint 1,0/1,5 (standard) 1,3.
Vanligtvis behöver du inte ändra standardbörvärdena. Du kan dock ändra dem efter behov antingen i Suunto-appen eller under huvudmenyn.
Så här ändrar du börvärden i Suunto EON Steel Black :
- I ytläge håller du mittknappen intryckt för att öppna huvudmenyn.
- Bläddra till Börvärde med den övre knappen och välj med mittknappen.
- Rulla till lågt börvärde eller högt börvärde och välj med mittknappen.
- Justera börvärdet med den nedre eller övre knappen och godkänn med mittknappen.
- Håll mittknappen intryckt för att stänga menyn.
Setpoint har växlats
Börvärden kan växlas automatiskt efter djup. Som standard är djupet för brytaren för lågt börvärde 4,5 m (15 fot) och djupet för brytaren för högt börvärde 21 m (70 fot).
Den automatiska växlingen av börvärde är som standard avstängd för det låga börvärdet och på för det höga börvärdet.
Så här ändrar du automatisk växling av börvärden i Suunto EON Steel Black :
- I ytläge håller du mittknappen intryckt för att öppna huvudmenyn.
- Bläddra till Börvärde med den övre knappen och välj med mittknappen.
- Rulla till knapp låg eller knapp hög och välj med mittknappen.
- Justera djupvärdet för börvärdesomkopplaren med den nedre eller övre knappen och godkänn med mittknappen.
- Håll mittknappen intryckt för att stänga menyn.
Popup-meddelanden anger när börvärdet ändras.

Under ett rebreather-dyk kan du också växla till ett anpassat börvärde när som helst.
Så här ändrar du till ett anpassat börvärde:
- När du dyker i ett rebreather-läge håller du mittknappen intryckt för att öppna huvudmenyn.
- Bläddra till Anpassat börvärde och välj med mittknappen.
- Justera börvärdet efter behov med den nedre eller övre knappen och godkänn med mittknappen.
Ett popup-meddelande bekräftar den anpassade börvärdesomkopplaren.

OBS:När du ändrar till ett anpassat börvärde stängs den automatiska växlingen av under resten av dyket.
Räddningsaktioner
Om du vid något tillfälle under ett rebreather dyk misstänker ett fel av något slag, bör du byta till en bailout gas och avbryta dyket.
Så här byter du till en räddningsgas:
- Håll mittknappen intryckt för att komma till huvudmenyn.
- Bläddra till OC-gaser och välj med mittknappen.
- Bläddra till önskad räddningsgas och välj med mittknappen.
När en räddningsgas har valts ersätts börvärdesfältet med PO 2- värdet för den valda öppna gasen.

Om felet åtgärdas eller dyksituationen på annat sätt normaliseras kan du byta tillbaka till ett spädningsmedel med samma procedur som beskrivs ovan, men välja från CC-gaser .
Återställ vävnader
Du har möjlighet att återställa vävnadsutrymmen, det vill säga att rensa data om kvarvarande kväve och helium efter ett dyk. Efter återställning av vävnad har tidigare dyk ingen effekt på beräkningarna av dykalgoritmen. Se så här återställer du vävnader för mer information om återställning av vävnad.
Säkerhetsstopp och djupstopp
Säkerhetsstopp och djupstoppstak är alltid på konstant djup när du befinner dig vid stoppet. Säkerhets- och djupstoppstider räknas ner i minuter och sekunder.
Säkerhetsstopp
Det finns två typer av säkerhetsstopp: frivilliga och obligatoriska. Säkerhetsstopp är obligatoriskt om stigningshastigheten har överskridits under dyket. Obligatoriska säkerhetsstopp visas i rött och frivilliga säkerhetsstopp visas i gult.
Ett tre (3) minuter långt säkerhetsstopp rekommenderas alltid för varje dyk över 10 meter (33 ft).
Tiden för ett säkerhetsstopp beräknas när du är mellan 2,4 och 6 m (7,9 och 19,8 ft). Detta visas med uppåt- och nedåtpilar till vänster om värdet för stoppdjupet. Tiden för säkerhetsstopp visas i minuter och sekunder. Tiden får överstiga tre (3) minuter om du stiger för snabbt under dyket. En överträdelse av uppstigningshastigheten förlänger tiden för säkerhetsstoppet med minst 30 sekunder. Om överträdelser sker flera gånger blir den tillagda stopptiden längre. Säkerhetsstopp kan ställas in på tre (3), fyra (4) eller fem (5) minuter i .
Frivilligt säkerhetsstopp visas i gult:

Obligatoriskt säkerhetsstopp visas i rött:

OBS:Om obligatoriska säkerhetsstopp utelämnas låses inte dykalgoritmen.
Djupstopp
Djupstopp aktiveras endast när du dyker djupare än 20 m (66 fot). Under uppstigningen aktiveras djupstopp när du är halvvägs upp från ditt maximala djup. Deepstops presenteras som säkerhetsstopp. Du befinner dig i djupstoppsområdet när djupstoppets djup har upp-/nedpilar framför sig och djupstoppstiden är igång. Djupstoppsfönstret är +/- 1,5 m (4,9 fot). Beräkningen startar vid måldjup för djupstopp plus 0,5 m (1,6 fot). Beräkningen avslutas - 3 m (- 10 fot) från djupstoppsdjup.
Det kan finnas mer än ett djupstopp under uppstigningen. Om du till exempel dyker till 42 m (137,8 fot) visas det första djupstoppet vid 21 m (68,9 fot) och det andra vid 10,5 m (34,4 fot). Det andra djupstoppet är 2 minuter långt.
I följande exempel dyker dykaren ner till maximalt 30,4 m (99,7 ft) och har ett djupstopp på 15,2 m (49,9 ft):

Under 20,0 m (66 fot) aktiveras djupstoppet. I det här fallet, när dykaren stiger, är djupstoppet nödvändigt vid halvvägs av det maximala djupet, så vid 15,2 m (49,9 ft).
Om djupstoppsdjupet är 15,2 m (49,9 fot) börjar beräkningen vid 15,7 m (51,5 fot) och slutar vid 12,2 m (40,0 fot). Djupstoppsfönstret är 1,5 m (4,9 fot) och när dykaren befinner sig inom djupstoppsfönstret indikeras det med två vita pilar som pekar mot varandra på displayen.
När dykaren stiger ovanför fönstertaket - i detta fall över 14,2 m (46,6 ft) - signalerar en nedåtriktad gul pil att djupet inte är optimalt, det rekommenderas att gå ner. Djupnumret för djupstoppet blir också gult.
Om dykaren fortsätter att stiga, efter 0,5 m (1,6 ft), en nedåtriktad röd pil och ett larm meddelar dykaren att gå ner omedelbart. Djupstoppsberäkningen fortsätter att köras ytterligare 1,5 m (4,9 fot) uppåt men stannar efter det. I exemplet ovan stannar den vid 12,2 m (40,0 fot).
OBS:Av säkerhetsskäl kan du inte stänga av djupstopp om helium (trimix gasblandningar) är aktiverat för det dykläge som används. När helium inte används kan djupstopp slås på och av. Det rekommenderas dock att du slår på djupstopp för alla dyk. Om djupstopp slås på men utelämnas under ett dyk, kommer det att påverka ditt nästa dyk som kommer att vara mer konservativt.
Samplingsfrekvens:
Suunto EON Steel Black använder en fast samplingsfrekvens på 10 sekunder för alla logginspelningar.
Standby och djup sömn
Standby och djupviloläge är två funktioner som är utformade för att förlänga batteritiden. Standby är en justerbar inställning som stänger av skärmen efter en viss tid för att spara batteri om Suunto EON Steel Black inte används.
Så här justerar du standbytiden:
- Håll mittknappen intryckt för att komma till menyn.
- Bläddra till allmänna » Enhetsinställningar » Standby .
- Öppna Allmänna genom att trycka på mittknappen.
- Bläddra uppåt/nedåt och välj önskad standbytid i minuter.
- Tryck på mittknappen för att spara ändringarna och återgå till enhetens inställningsmeny.
- Håll mittknappen intryckt för att avsluta.
Djupt viloläge
Djupviloläge är en funktion som förlänger batteritiden när Suunto EON Steel Black inte har använts på ett tag. Djupsömn aktiveras när två dagar har gått sedan:
- Inga knappar har tryckts in
- Dykberäkningen har avslutats
Suunto EON Steel Black vaknar när den är ansluten till en dator/laddare, när en knapp trycks in eller när vattenkontakten blir våt.
Yt- och flygförbudstid
Efter ett dyk visar Suunto EON Steel Black yttiden sedan föregående dyk och en nedräkningstid för den rekommenderade flygförbudstiden. Under flygförbudstiden bör du undvika att flyga eller resa till högre höjd.

Flygförbudstiden är den kortaste rekommenderade yttiden efter ett dyk som dykaren bör vänta innan hon eller han flyger i ett flygplan. Det är alltid minst 12 timmar. För kväveutvädringstider kortare än 75 minuter visas inte flygförbudstiden. Maximal flygförbudstid är 72 timmar.
Om dekompression utelämnas under ett dyk och dykalgoritmen är låst i 48 timmar (se Algorithm Lock ) är flygförbudsfristen alltid 48 timmar. På samma sätt, om dyk görs i mätläge (bottentimer), är flygförbudstiden 48 timmar.
Med Suunto Fused™ RGBM 2 påverkar den valda parametern för personliga inställningar (-2, -1, 0, +1, +2) flygförbudsdagen. Ju mer konservativ personlig inställning du har, desto längre flygförbudsvärden kommer du att se. En mer aggressiv personlig inställning ger kortare flygförbudsvärden.
När flygförbudsfristen som beräknats av Suunto EON Steel Black med Suunto Fused™ RGBM 2 har löpt ut kan du gå in och flyga med ett normalt flygplan som är trycksatt upp till 3000 m.
VARNING:DU SKA ALLTID UNDVIKA ATT FLYGA NÄR DATORN RÄKNAR NER FLYGFÖRBUDSTIDEN. AKTIVERA ALLTID DATORN OCH KONTROLLERA ÅTERSTÅENDE FLYGFÖRBUDSTID INNAN DU FLYGER! Att flyga eller resa till en högre höjd inom flygförbudstiden kan avsevärt öka risken för tryckfallssjuka. Gå igenom rekommendationerna från Divers Alert Network (DAN). Det kan aldrig finnas någon regel om flygning efter dykning som helt garanterar att tryckfallssjuka inte kan uppkomma!
Suunto-appen
Med Suunto-appen kan du enkelt anpassa enhets- och dykinställningar. Se anpassa dyklägen med Suunto-appen och anpassa dyklägen med Suunto-appen .
Du kan också överföra dina dykloggar trådlöst till appen där du kan följa och dela dina dykäventyr.
Så här parkopplar du med Suunto-appen på iOS:
- Hämta och installera Suunto-appen på din kompatibla Apple-enhet från App Store. Appbeskrivningen innehåller den senaste kompatibilitetsinformationen.
- Starta Suunto-appen och aktivera Bluetooth om du inte redan gjort det. Låt appen vara igång i förgrunden.
- Om du ännu inte har ställt in Suunto EON Steel Black gör du det nu (se Enhetsinställningar ).
- Tryck på klockikonen i det övre vänstra hörnet av skärmen och tryck på + -ikonen för att lägga till en ny enhet.
- Välj din dykdator i listan över hittade enheter och tryck på PARA IHOP .
- Ange lösenordet som visas på dykdatorns skärm i fältet för begäran om ihopparning på din mobila enhet.
- Tryck på PARA IHOP längst ned i fältet förfrågan.
Så här parkopplar du med Suunto-appen på Android:
- Hämta och installera Suunto-appen på din kompatibla Android-enhet från Google Play. Appbeskrivningen innehåller den senaste kompatibilitetsinformationen.
- Starta Suunto-appen och aktivera Bluetooth om du inte redan gjort det. Låt appen vara igång i förgrunden.
- Om du ännu inte har ställt in Suunto EON Steel Black gör du det nu (se Enhetsinställningar ).
- Tryck på klockikonen i det övre högra hörnet av skärmen.
- Välj din dykdator i listan över hittade enheter och tryck på PARA IHOP .
- Ange lösenordet som visas på dykdatorns skärm i fältet för begäran om ihopparning på din mobila enhet.
- Tryck på PARA IHOP längst ned i fältet förfrågan.
OBS:Det går inte att parkoppla någonting om flygplansläget är aktiverat. Inaktivera flygplansläget innan du parkopplar.
Synkroniserar loggar och inställningar
För att kunna synkronisera loggar och inställningar måste du först installera Suunto-appen.
Så här hämtar du loggar från Suunto EON Steel Black och synkroniserar inställningar:
- Anslut Suunto EON Steel Black till din mobila enhet via Bluetooth.
- Starta Suunto-appen.
- Väntar på att synkroniseringen ska slutföras
Nya dykloggar visas i din aktivitetshistorik, sorterade efter datum och tid.
SuuntoLink
Använd SuuntoLink för att uppdatera programvaran på Suunto EON Steel Black . Ladda ner och installera SuuntoLink på din PC eller Mac.
Vi rekommenderar starkt att du uppdaterar din enhet när en ny programvaruversion är tillgänglig. Om en uppdatering finns tillgänglig meddelas du via SuuntoLink och i Suunto-appen.
Besök SuuntoLink för mer information.
Uppdatera din dykdator nu!
- Anslut Suunto EON Steel Black till datorn med den medföljande USB-kabeln.
- Starta SuuntoLink om det inte redan körs.
- Klicka på uppdateringsknappen i SuuntoLink.
Tips:För att synkronisera dina dyk ansluter du enheten till Suunto-appen före programvaruuppdateringen.
Flasktryck
Suunto EON Steel Black kan användas med totalt tjugo (20) gaser per dykläge, som var och en kan ha Suunto Tank POD för trådlös överföring av tanktryck.
Information om hur du installerar och parkopplar en Suunto Tank POD finns i så här installerar och parkopplar du en Suunto Tank POD .
I vyn för tanktryck kan du se skärmarna nedan.
I följande exempel är larmet för tanktryck inställt på 100 bar. Tanktrycket är 75 bar, vilket visas i omkopplarfönstret i det nedre högra hörnet.
Tanktrycket visas i gult när det är över 50 bar (720 psi) och under det larmvärde för tanktryck som ställts in av användaren:

När tanktrycket sjunker under 50 bar (720 psi) visas det aktuella tanktryckvärdet i rött i omkopplarfönstret och ett obligatoriskt larm utlöses:

Timer
Suunto EON Steel Black har en timer som kan användas för tidsspecifika åtgärder under ytan eller dyket. Timern visas i det nedre högra hörnet som ett rullbart objekt.
OBS:I timervyn visas timern som en analog klocka.
Så här använder du timern:
- Tryck på den övre knappen för att pausa registreringen.
- Tryck på den övre knappen för att pausa registreringen.
- Aktivera klockan genom att hålla den övre knappen nedtryckt.
Timerns start- och stoppåtgärder sparas i dykloggen.
Vattenkontakten sitter på sidan av höljet nära USB-kabelporten. Vid nedsänkning är vattenkontaktpolerna anslutna genom vattnets ledningsförmåga.
Suunto EON Steel Black växlar till dykläge när vatten upptäcks. Dyket har startat
- när vattenkontakten är på, vid 1,2 m (4 fot), eller
- när vattenkontakten inte är på, vid 3,0 m (10 fot)
och slutar
- när vattenkontakten är på och djupet är mindre än 1,2 m (4 fot), eller
- när vattenkontakten inte är på och djupet är 3,0 m (10 fot).
När vattenkontakten är aktiv blir färgen på djupavläsningssiffrorna vit.