


Suunto Blog


AERO WHEELS WILL MAKE YOU FASTER
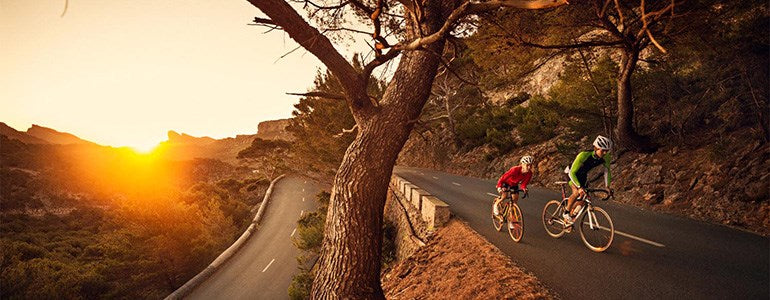
High profile aero wheels used to be regarded something that were mostly used in time trials and triathlons. But in recent years aerodynamics and aero wheels have taken off in road cycling as well. Decrease in aerodynamic drag and increase in speed are a welcome addition to any cyclist.
Aerodynamic drag is the main form of resistance working against a cyclist. The benefits of being more aerodynamic are most obvious for fast riders but it helps in slower paced riding too as more time will be spent in the wind.
The most effective way to decrease your drag is to optimize your riding position on the bike. A reduced frontal area will increase the speed – and save you energy.
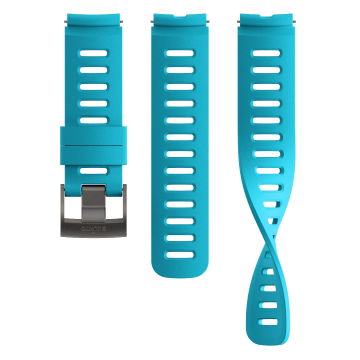
On the equipment side one of the most important ways to improve aerodynamics is to use high-performance aero wheels. Wheels play a key role in aerodynamics since the front wheel is pushing through the air first. Its shape is complex.
The most crucial part of the aero wheels is the height of the rim as well as its width and overall shape. The profile of the rim smoothes the air coming around the tyre and rim. Basically the higher the profile, the less drag the wheels produce. For this reason full disk wheels are the most aerodynamic – and the fastest. However, disk wheels are more difficult to use in cross winds.
The rim height and profile are not the only components affecting the aerodynamics of a wheel. A wheel is an entity where every component from rims to spokes, hubs and tyres have their own role and effect on performance.
The overall rim-tyre shape improves the riding characteristics of high profile wheels in windy conditions. When both together are forming a perfect airfoil shape (NACA profile), side wind resistance is reduced and stability improved. This makes 60 mm tall rims pretty easy to ride in much more conditions than one would think.
A great example of this is Mavic’s integrated wheel-tyre systems. They smoothe airflow around the tyre and wheel, and improve streamlined airflow at every yaw angle.
Mavic Cosmic CXR 60’s unique CX01 technology unifies the rim and tyre together, saves time and watts in every condition and provides high stability in crosswind. Their 60 mm wind tunnel optimized rim profile with extra-light carbon rims fitted with Yksion CXR tyres enable a very dynamic ride.
Action images: © Loris Von Siebenthal / Mavic


BENEFITS FOR USING TRAININGPEAKS WITH YOUR SUUNTO
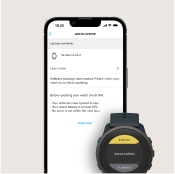
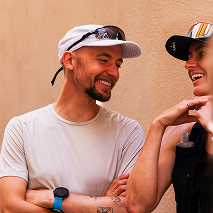
Suunto became compatible with TrainingPeaks this spring. We got in touch with Canadian ultra runner Rodney Buike to learn more about the service.
Rodney Buike started his athletic career as an alpine ski racer and a mountain biker but has since evolved into an endurance athlete covering longer and longer distances. First he competed in duathlons and triathlons, but has recently started to run ultras, too.
Buike has been using TrainingPeaks as his main tracking application since 2011.
“I initially started with the free version of TrainingPeaks but soon switched to TrainingPeaks Premium for some of the added capabilities,” says Buike.
“For me the best feature is the Performance Management Chart. It gives me a real ability to manage my fitness and fatigue levels over the course of my racing season.”
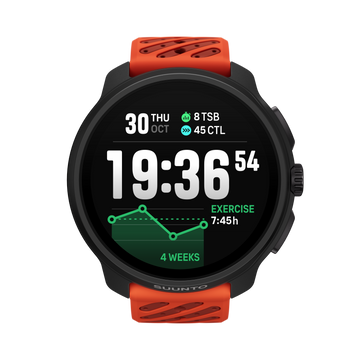
TrainingPeaks’ Performance Management Chart (PMC) tracks chronic training load (CTL based on activities older than 15 days) and acute training load (ATL based on the last 14 days of activity). These numbers are based on the athlete’s thresholds which allows TrainingPeaks to calculate the intensity (IF) and Training Stress Score (TSS). This is then used to calculate Training Stress Balance (TSB). All this data can be used to monitor progress and ensure a smooth steady build up and then taper to main race or races.
Here’s Buike’s own PMC starting with the beginning of training for his first 50K race.
Rodney Buike’s 180-day Performance Management Chart
“The first vertical red line is the peak of training with the longest run before tapering began for the race (the next vertical red line). Then you can see the recovery period and the final vertical red line indicating when training began again,” Buike explains.
“There are a few important things you can see in this graph: First off you can see a long slow steady build with the gradual increase in the CTL (the blue line). There are smaller spikes along the line, which individually identify the key long runs followed by short recovery periods – but an overall steady climb. The TSB (orange line) moves into the positive as I recover and taper for the race while the ATL drops as training load is decreased.”
Over the course of time the Performance Management Chart can help you plan your taper and recovery to ensure you are doing just enough to maintain fitness while recovering properly to ensure your best performance on race day.
SET YOUR ZONES FIRST
While this all sounds very complex there are a few very basic things that all athletes can take advantage of immediately.
“The first thing I recommend is to set your zones. If you are using HR based training you can set different zones for all activities. For specific activities you can also define additional zones. I highly suggest runners to set their pace zones, which can be done using the results of a recent 10KM running race. Cyclists, who have a power meter, can input their functional threshold power (FTP) and use that to build power zones.”
In addition to the Performance Management Chart, Buike highlights the premium version’s advanced charts that you can use to drill deeper into the data (power analysis, scatter graphs, etc.). He also finds the planning tools very useful.
“With the premium version you have the ability to plan out your upcoming week, month or longer and have that sync with your calendar in Outlook, Gmail, Apple iCalendar or any calendar tool that supports ICS files. When you upload activities they will automatically populate the related activity in your TrainingPeaks calendar,” says Buike.
So how does your own calendar look for the coming weeks?
“I have decided to move into the ultra running world and completed my first 50 km and 80 km races recently. In May I have a 130km race coming up.”

TUTORIAL TUESDAY: WHERE AM I? FINDING YOUR LOCATION WITH AN AMBIT
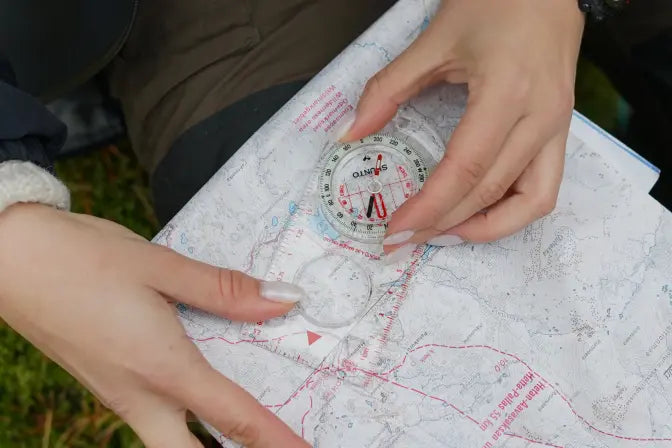
Figuring out where you are is fairly simple when you have a map, the visibility is good and you can identify a few landmarks. But when the going gets rough, the weather is against you and the sun sets, the task isn’t so simple any more. In this tutorial you will learn how your Ambit can help you to find your location.
The basics are simple: you can find your current position with a few clicks of the Ambit.
Choose: Navigation – Location – Current
To make sure you get the satellite fix as quickly as possible, remember to sync your Ambit regularly and keep it up to date.
Once you have found the GPS signal you will get your current location in geographic coordinates. The most common coordinate system in GPS devices is WGS84, which is also used by default in Suunto GPS watches.
Use the same coordinate system on your watch and map
If you need to give your exact location to someone in a rescue situation, WGS84 works. But when you start using a map and defining your location on it, you will need to make sure your GPS watch and the map use the same coordinate system. (To change your Ambit’s coordinate system go to General – Formats – Position format.)
Latitude/longitude is the coordinate system used in marine navigation and is common on topographical outdoor maps. Latitude lines run horizontally. The zero latitude is the Equator. Longitudes run vertically and the zero longitude runs through Greenwich, England. The latitude is normally the first number expressed in lat/long coordinate (for example 60°16'19" N 24°58’23’’ E).
WGS84, which uses latitudes/longitudes, is actually more than a coordinate system: it also includes a model of the globe that enables the use of GPS altimeters.
UTM is a grid coordinate system that is used on many outdoor maps. It divides the map into a perpendicular grid in which each of the squares are the same size anywhere on the map. This means the coordinate system is tied directly to a distance in meters.
This Norwegian map has both WGS84 (black) and UTM (blue) coordinates.
The black numbers on the sides of the map are degrees latitude; the numbers on the top and bottom of the map are degrees longitude. To determine your location on the map, draw a west to east line through the corresponding latitude and a south to north line through the corresponding longitude. The intersection of the two lines indicates your position.
The blue numbers are the northings and eastings of the UTM coordinate system. You can use them like the lat/log when finding your location on the map.
You can get support for your Suunto product at support


Coast to Coast: an iconic adventure race
Speight’s Coast to Coast is an iconic multisport race across New Zealand's South Island. Every year, more than 800 competitors line up to run, cycle and paddle the 243km width of the island. No one knows more about the event than 5-time winner and current race director, Richard Ussher. He explains its enduring appeal.
Why is the race so iconic?What really sets it apart is the concept of crossing a country in a day (or two). New Zealand’s South Island is the perfect distance – long enough to be a real challenge, yet short enough to be achievable by more than just the truly insane.
Is it more adventure-race or triathlon?I’d say it falls between the two. Top competitors certainly treat it more like a triathlon, where further down the field you probably get more into the adventure-racing realm.
Richard also created a Suunto Movie of the Coast to Coast Mountain Run course with his Suunto Ambit3, which you can see here.
Post by Richard Ussher.
Which discipline decides who wins?You really have to be an all-rounder to win. The two sections that tend to decide the race are the Mountain Run and the Kayak. But then there’s still 70km of cycling to finish it off – normally into a stiff headwind.
Did you record the Running Stage time yourself?Yes. It’s probably close to what the bulk of the better two-day runners will set. The top one-day and team competitors are closer to the 3-hour mark though. Last year’s winner Braden Currie clocked 2:49 for the run.
How did you become race director?The event was sold to a company called Trojan Holdings in 2013. They contacted many former participants and asked them where they thought the race needed to go. I was a little vocal in my opinions, and after talking with them, ended up in the role. It certainly wasn’t something I thought about before, but it’s a great opportunity.
So you’re retired?No, I’m not retired. I had a very tough 2014 because of injury, but I can finally see light at the end of that tunnel. My focus is obviously on the management side of Coast to Coast now, but I still love getting out and competing. Nowadays, I’m more focused on competing in races that I’ve always wanted to do.
How do you like the Suunto Movie Tell us about Suunto Movie on the Ambit?I really like this feature, especially where you get to see the whole course in the revolving view. I can see it being really useful for multisport athletes, as it gives you an idea of what the course might be like, and to a certain degree helps create a picture of the gradients involved.
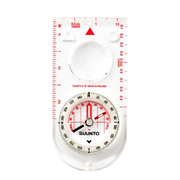
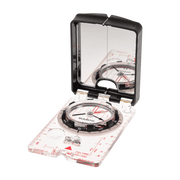
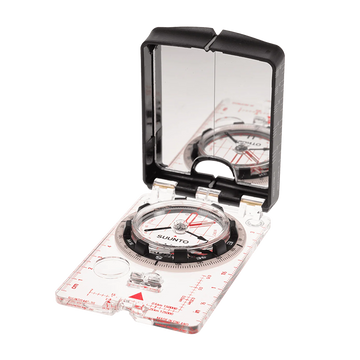
Have you used Suunto products before?Yes, I’ve been using Suunto products from early on in my adventure-racing career – starting with the Suunto Advizor, which I still have. I also use the global compass range and orienteering compasses as well as Suunto’s Ambit and Core watches. Suunto products have always been fantastic.
Follow the race here: www.coasttocoast.co.nz
All pics ©sportzhub.com
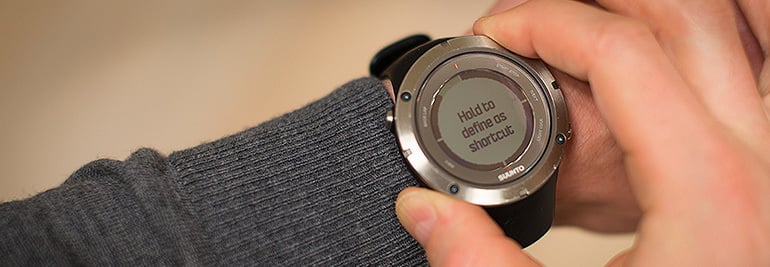

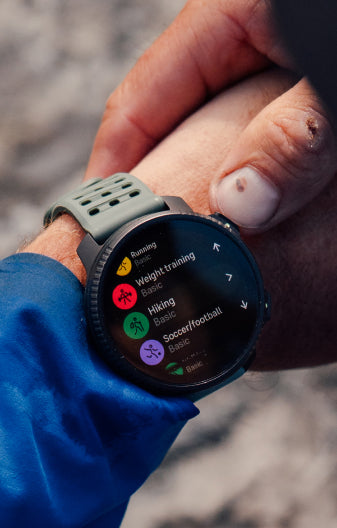
Tutorial Tuesday: Customize your Ambit’s shortcut button
Do you have a favorite Ambit feature that you wish you could access quicker? No worries, in time mode you can access any menu item with a single push of a button after you have taught your Ambit2 or Ambit3 what you wish the shortcut button will do.
The shortcut button comes in handy in many ways. For example, it is a quick way to set the wake-up alarm and travellers can use the shortcut to easily set the dual time to match the destination’s time zone. And for your most frequent activity the shortcut button can lead straight to the right sport mode setting you ready to go with a single push of a button.
Here's how to use your Ambit's shortcut.
DEFINE A SHORTCUT
By default, when you keep [View] pressed in TIME mode, you toggle the display between light and dark. This shortcut can be changed to a different menu item.
To define a shortcut:
1. Keep [Next] pressed to enter the options menu or press [Start Stop] to enter the start menu.2. Browse to the menu item to which you want to create a shortcut. 3. Keep [View] pressed to create the shortcut.
Your own shortcut works when the watch is in time mode. In other modes, keeping [View] pressed accesses predefined shortcuts. For example, when the compass is active, you can access the compass settings by keeping [View] pressed.
NOTE: Shortcuts cannot be created to all possible menu items, such as individual logs.
You can get support for your Suunto product at support

Head south for the perfect winter training camp
Winter may be here but that’s no reason to ease up on the training. Follow the example of the pros and migrate south for your warm weather fix. The only question is where to go. These five destinations should help you choose where to set your winter travel compass... Mallorca, SpainSmooth roads and long climbs – for many years, cyclists have been making the pilgrimage to the Mediterranean island of Mallorca and it's not difficult to see why. Just a two-hour flight from most of Europe. Mallorca’s terrain varies from flat coastal roads, to steep mountain passes. The longest climb on the island, the Puig Major, rises to 854m over the course of 14km. It's also the perfect photoshoot location, as these pics from our photoshoot below show.
Trail running in Mallorca on the Suunto photoshoot. ©zooom.at/Markus Berger
Tenerife, Canary IslandsBoasting the longest continuous climb in Europe – from sea level to 2,200m in one hit – Tenerife is the ideal place for those looking to improve their performance in the saddle. Offering dry and warm weather over the winter months, it's an ideal spot for migratory cyclists and triathletes. The island is also where the 2012 Tour de France winner Bradley Wiggins trained. But we can't promise it will put you in contention for the yellow jersey.
©Club La Santa, LanzaroteLanzarote, Canary IslandsThe favored destination of many a triathlete, Lanzarote is home to several training camps as well as one of the toughest Ironman events in the world. One of the reasons for its difficulty? Lanzarote is notorious for its wind, which has been known to destroy the spirit and soul of many a cyclist. Fortunately, the island is home to many world class Olympic pools, such as those at Club La Santa and superb trail running for when you want to recover from the bike. Stellenbosch, South AfricaIf you really want to escape winter, you need to head to the southern hemisphere. With its long open roads South Africa's wine growing region of Stellenbosch has been a favored pre-season training ground for many pros, including Jan Frodeno and Javier Gomez. Great riding in the mountains; top training facilities and pools in the University of Stellenbosch, and excellent wine of course.
Open water swimming in Mallorca. ©zooom.at/Markus Berger
San Diego, CaliforniaIt's no accident that San Diego is the birthplace of modern triathlon; the warm Pacific waters provide the perfect venue for open water swimming, trails abound for runners while inland you can find endless hills to crank out the miles in the saddle. Best of all, it has an average temperature of 21ºC and it's open all year round.